> For the complete documentation index, see [llms.txt](https://docs.nested-knowledge.com/llms.txt). Markdown versions of documentation pages are available by appending `.md` to page URLs; this page is available as [Markdown](https://docs.nested-knowledge.com/collaborate/allocation.md).

# Allocation

Learn how to enable Allocation and assign sets of records at each review stage to specific users.

**Allocation** assigns records to reviewers at each review stage. Use it to divide work while controlling record access.

### Turn On Allocation

To enable **Allocation**, open **Nest Settings**. Scroll to **Allocation**, then turn on the toggle.

<figure><img src="https://content.gitbook.com/content/xb7uNGATUgwQAjDVQRXG/blobs/QKzg7Xu5speXtg8UTXEk/Screenshot%202024%2010%2024%20at%2019.06.09.png" alt="Nest Settings page showing the Allocation toggle"><figcaption><p>Enable Allocation in Nest Settings.</p></figcaption></figure>

The **Nest Home** menu then shows the **Allocation** page, this is also referred to as **Allocation Admin**. Use it to assign records by module, filter, or percentage.

{% hint style="info" %}
When you enable **Allocation**, assign every module or none. You can't combine allocated and unallocated modules.

Administrators can assign records to any user, including themselves. Each user sees only their allocated records, including administrators. Unallocated records don't appear in that module until you assign them.
{% endhint %}

### Allocate Records

Records must exist in the nest before you can allocate them. Add a [Literature Search](/review-workflow/literature-search.md) first.

Allocate records for [Screening](/review-workflow/screening.md), [Tagging](/review-workflow/tagging.md), [Meta-Analytical Extraction](/review-workflow/meta-analytical-extraction.md), and [Critical Appraisal](/review-workflow/critical-appraisal.md).

{% stepper %}
{% step %}

#### Open Allocation

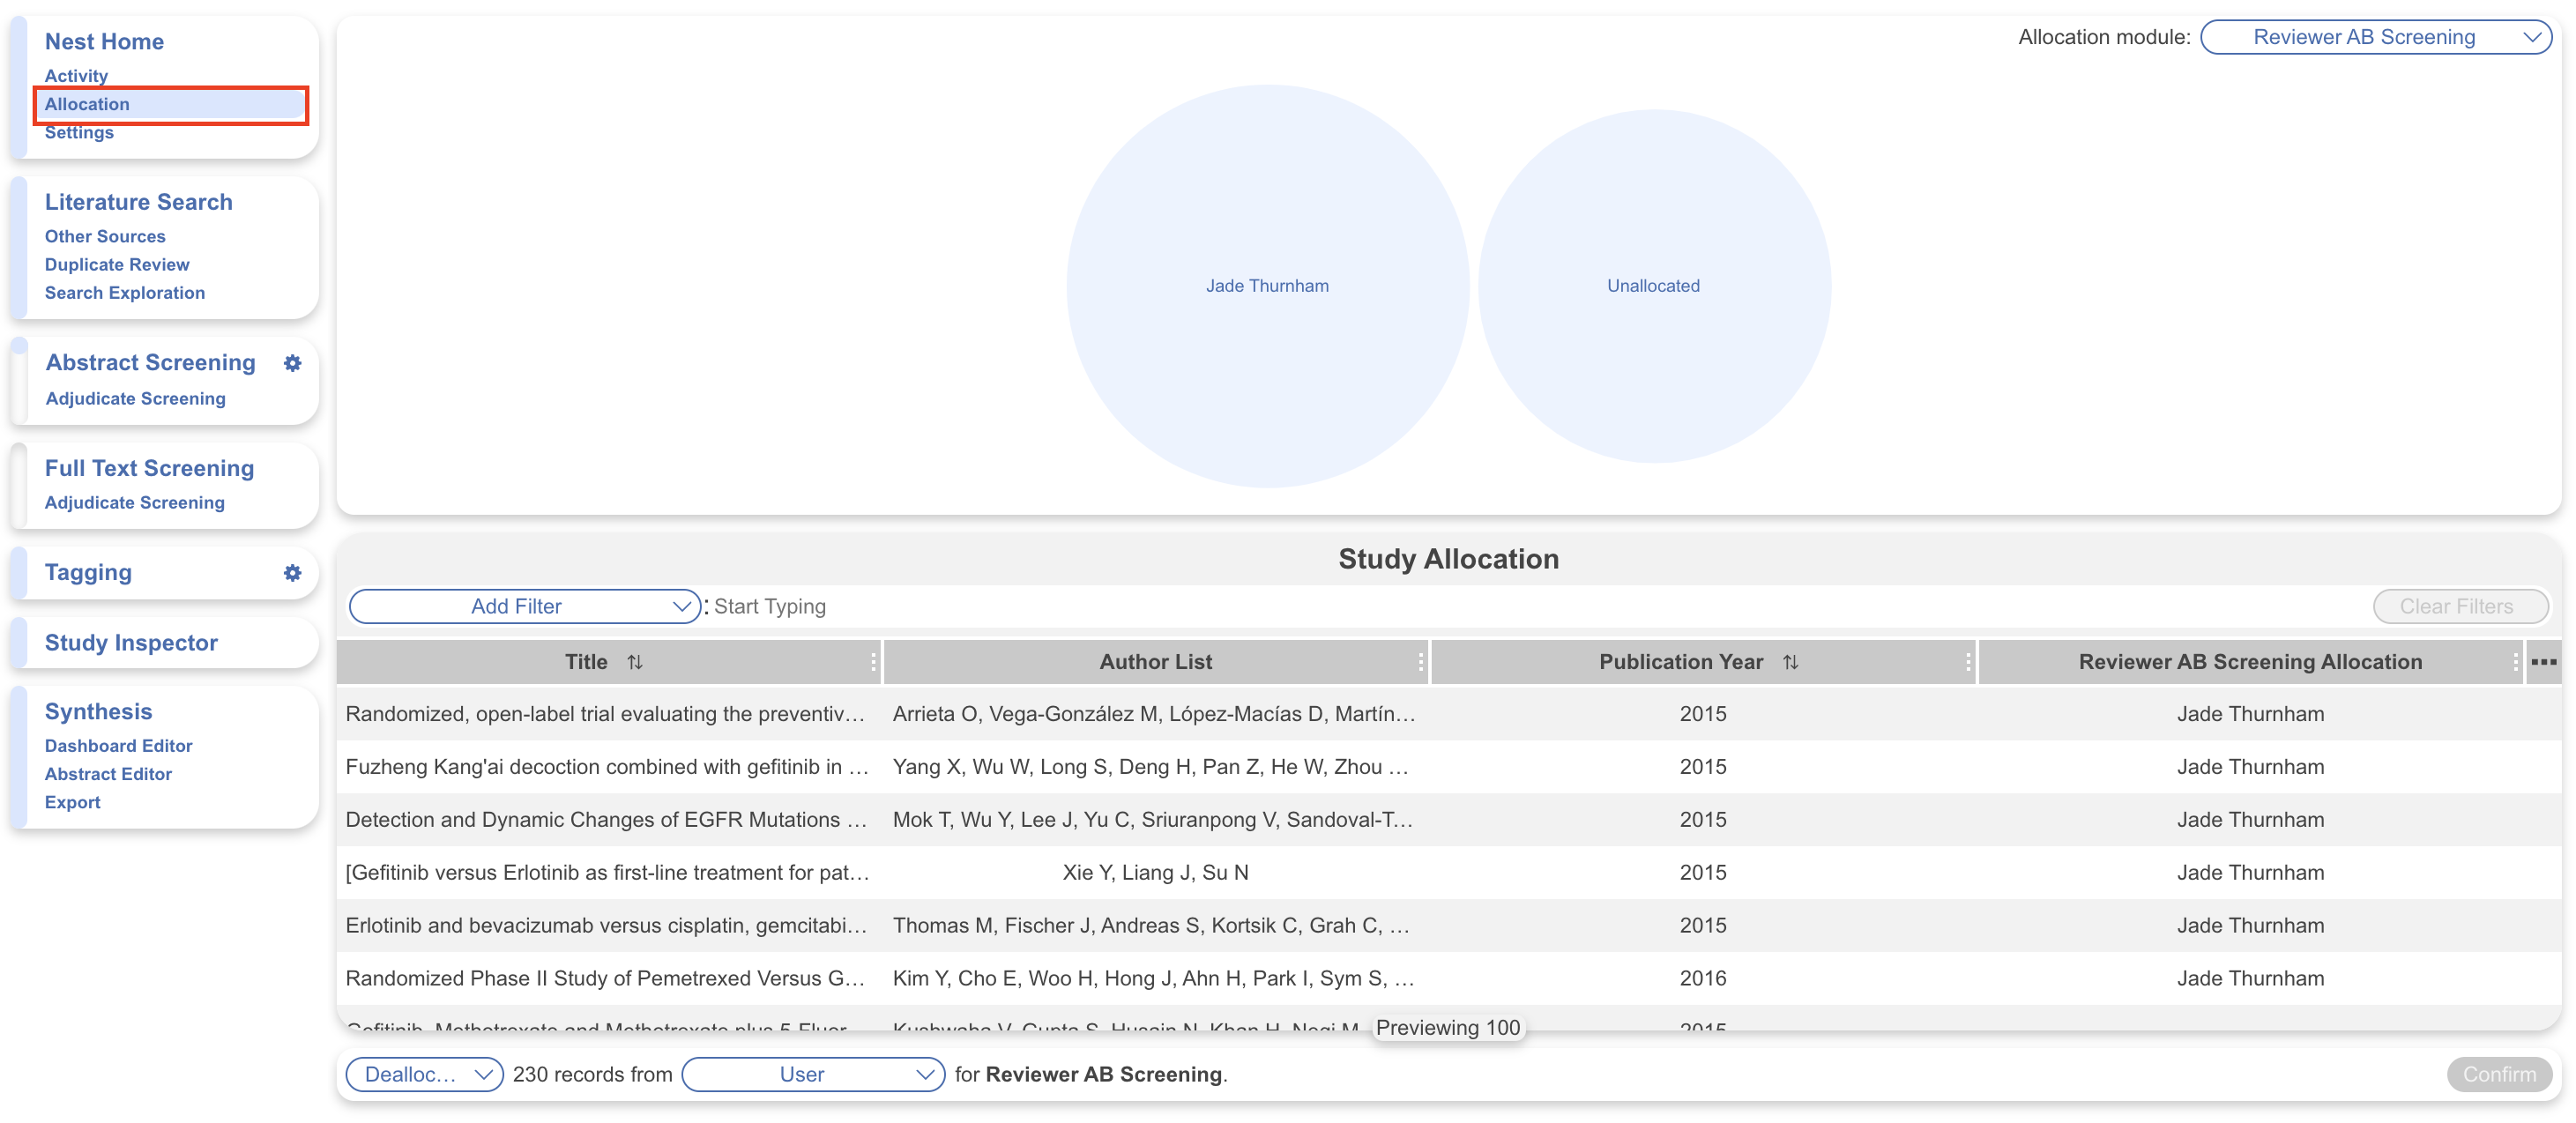
On **Nest Home**, select **Allocation**. Opening a module with unassigned records also directs you to **Allocation Admin**.

<figure><img src="https://content.gitbook.com/content/xb7uNGATUgwQAjDVQRXG/blobs/92yUjmEBdGc7P3TvT3aW/Screenshot%202024%2010%2024%20at%2019.17.04.png" alt="Nest Home menu with Allocation selected"><figcaption><p>Open Allocation from Nest Home.</p></figcaption></figure>
{% endstep %}

{% step %}

#### Select A Module

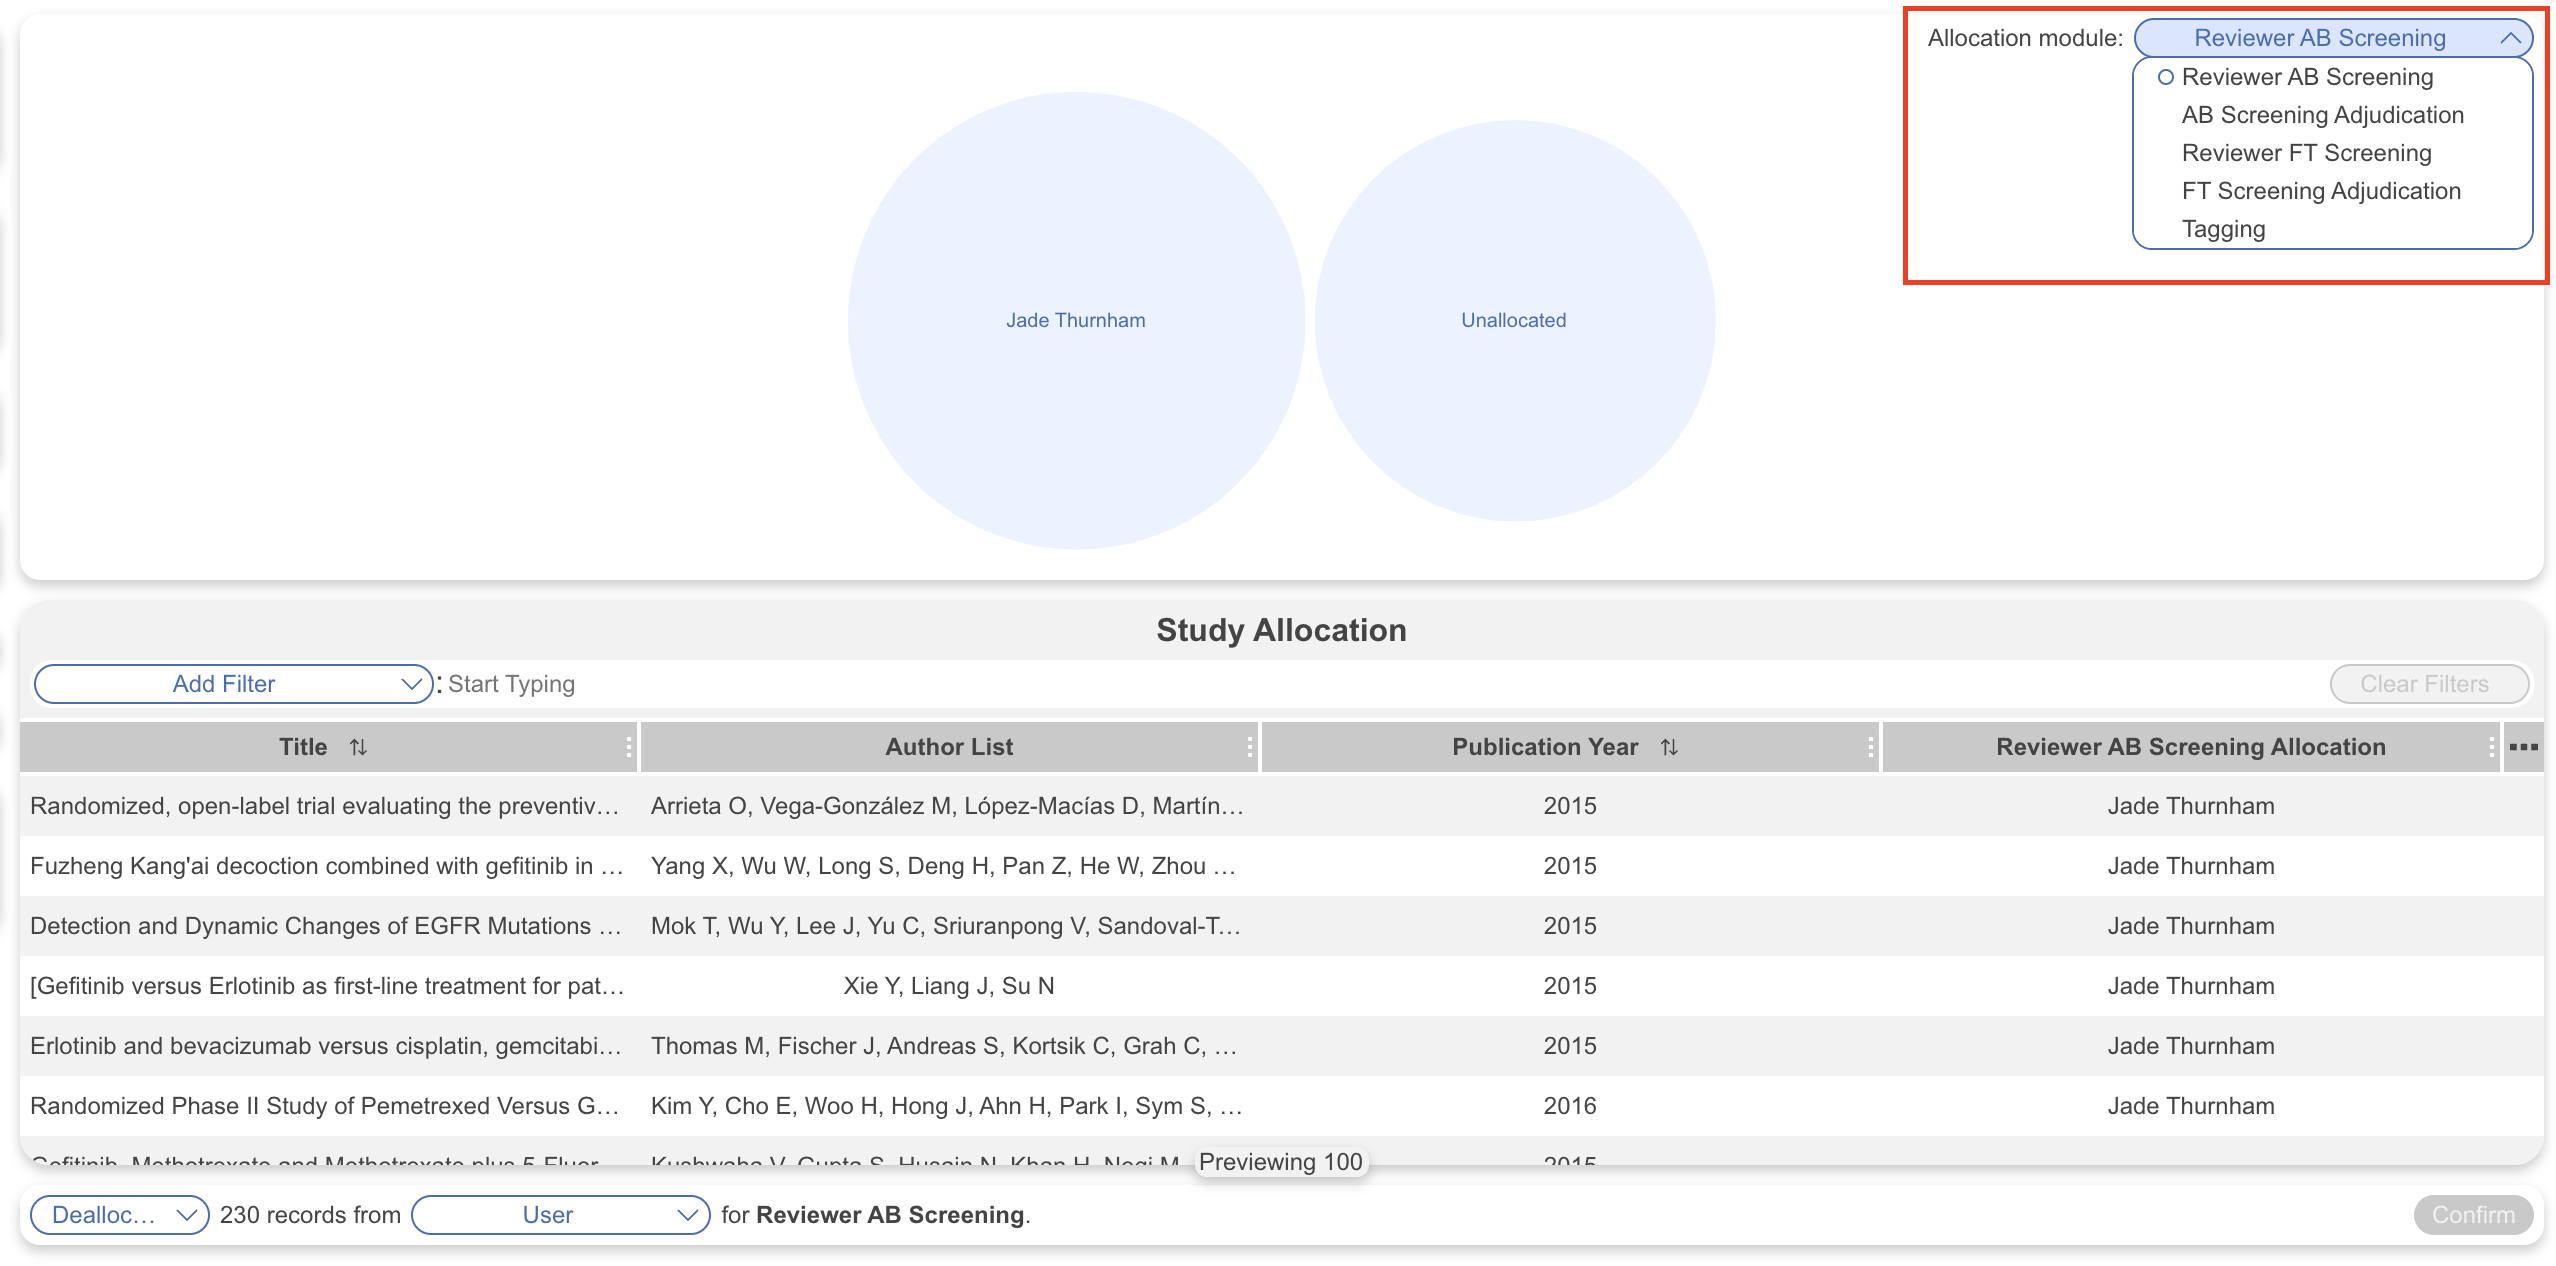
In the top-right menu, select the module for these records. After adding a search, only **Screening** is available. Modules become available for assigning once the previous one is complete.

<figure><img src="https://content.gitbook.com/content/xb7uNGATUgwQAjDVQRXG/blobs/gO6Tx547wrm1uGh8TfDZ/Screenshot%202024%2010%2024%20at%2019.17.28.png" alt="Allocation page module menu"><figcaption><p>Select the module where you want to allocate records.</p></figcaption></figure>
{% endstep %}

{% step %}

#### Filter Records

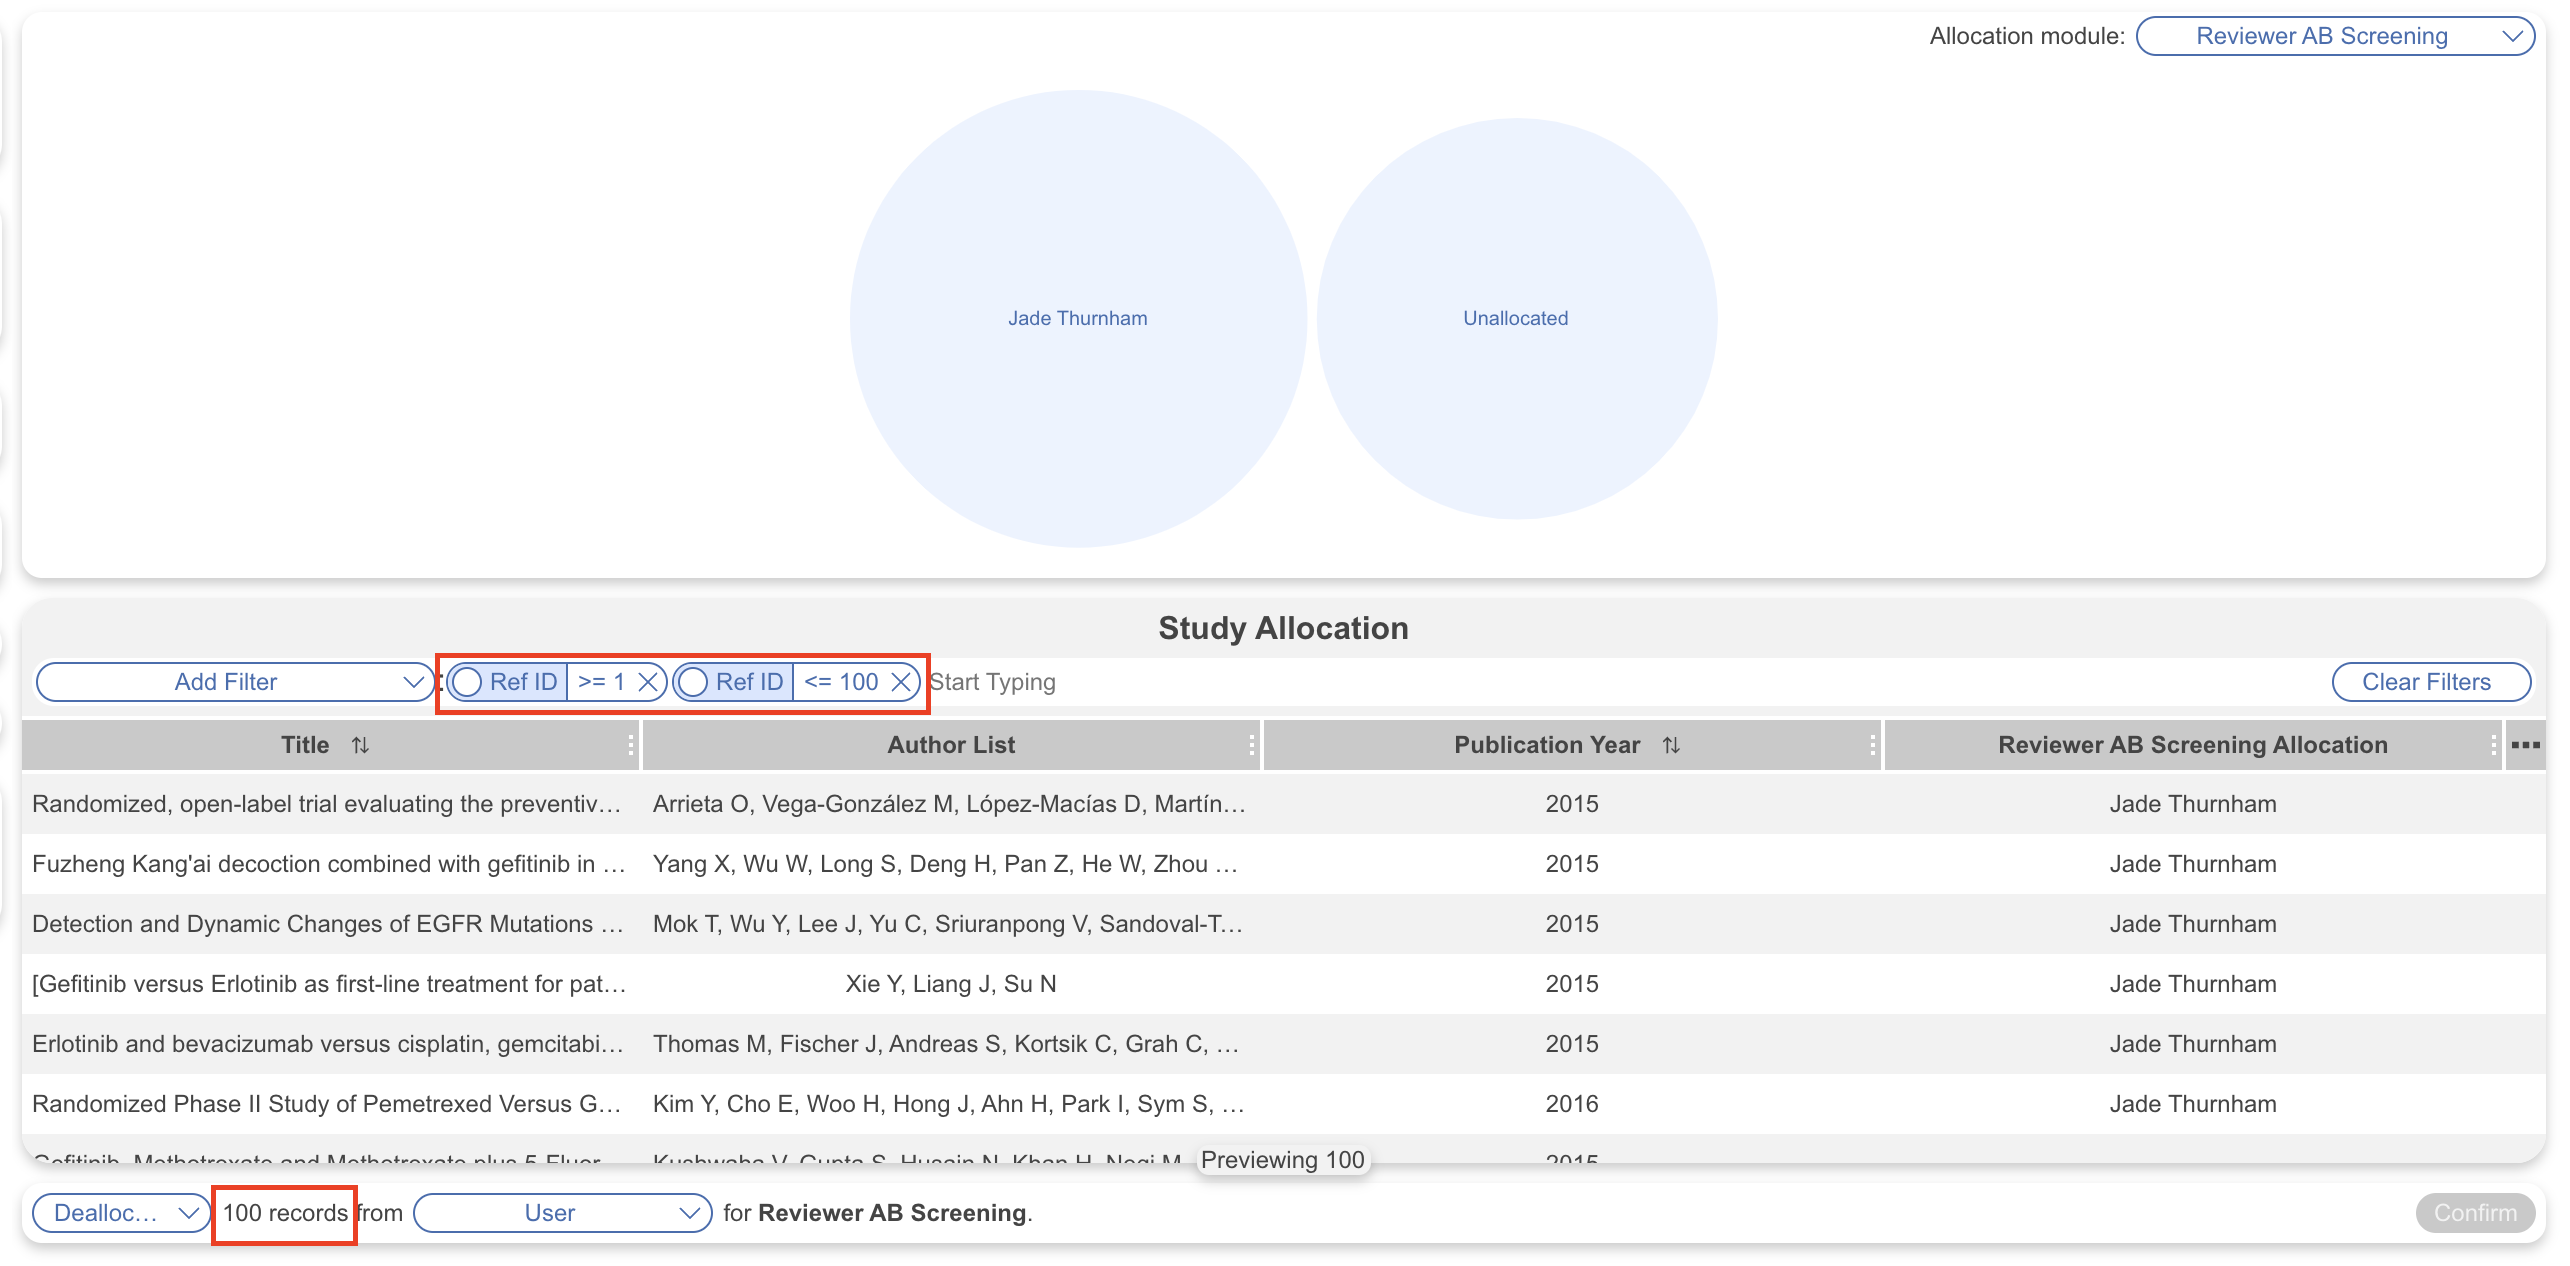
Filter records in order to assign a specific set to a user. Use the filters available that mirror those in [Study Inspector](/review-workflow/study-inspector.md), or assign a percentage of all records.

**Add a filter**

For example, filter a range of Ref IDs, then assign the results to one user.

Skip this step to assign all records to one user.

<figure><img src="https://content.gitbook.com/content/xb7uNGATUgwQAjDVQRXG/blobs/t3ErIAy8Lm9zN3WZnC1I/Screenshot%202024%2010%2024%20at%2019.18.05.png" alt="Allocation page filters"><figcaption><p>Use filters to select records before assigning them.</p></figcaption></figure>

{% hint style="info" %}
Some filters are added automatically and can't be removed. They ensure each module shows only the records available at that stage.

For example, **Tagging** shows only records included during **Screening**. It includes the **Final Screening Status: Included** filter.
{% endhint %}

**Allocate a percentage**

To randomly assign a percentage of records, enter the percentage and select a user.
{% endstep %}

{% step %}

#### Assign Records

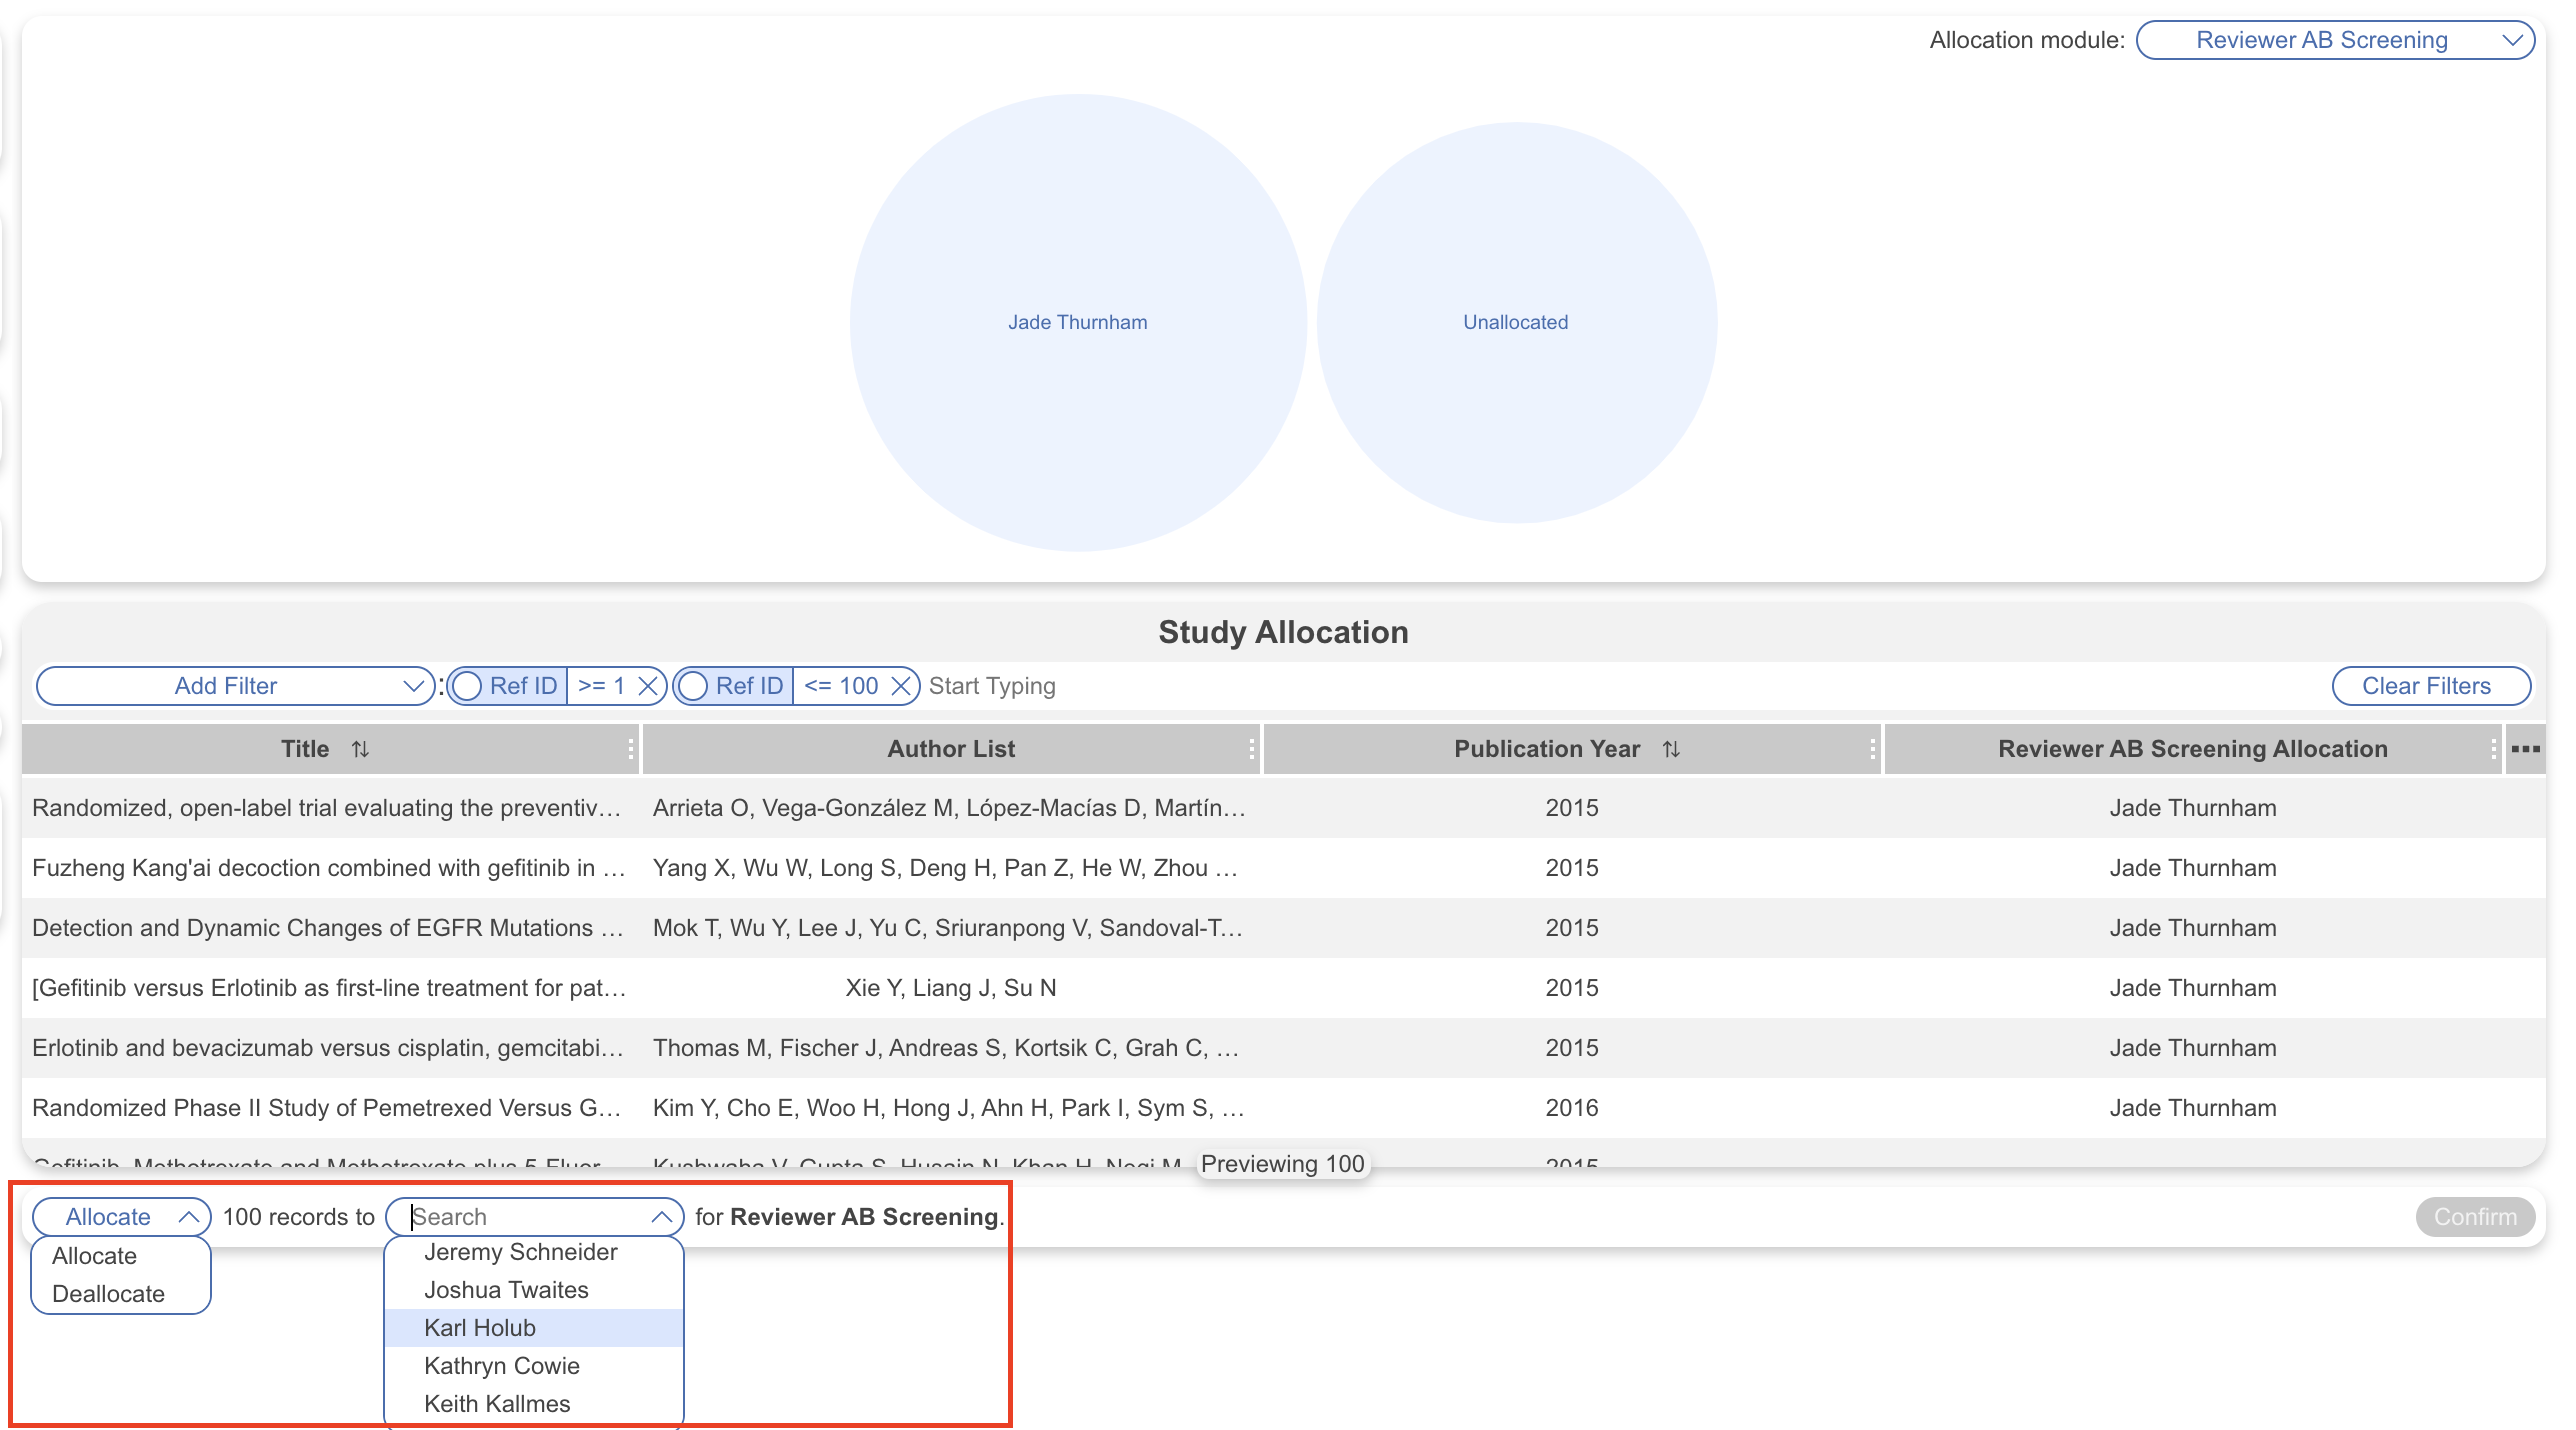
Ensure Allocate is selected.

Confirm number of records.

Select a user. Select **Confirm**.

Assigned users aren't notified. They see their records when opening the nest and view the corresponding module.

The **A** beside a user's name in the dropdown identifies a nest administrator.

<figure><img src="https://content.gitbook.com/content/xb7uNGATUgwQAjDVQRXG/blobs/VHBoEGiBgWxkwgAx3N6X/Screenshot%202024%2010%2024%20at%2019.18.57.png" alt="User assignment list showing 100 selected records"><figcaption><p>Select a user and confirm the record assignment.</p></figcaption></figure>
{% endstep %}
{% endstepper %}

### Use The Venn Diagram

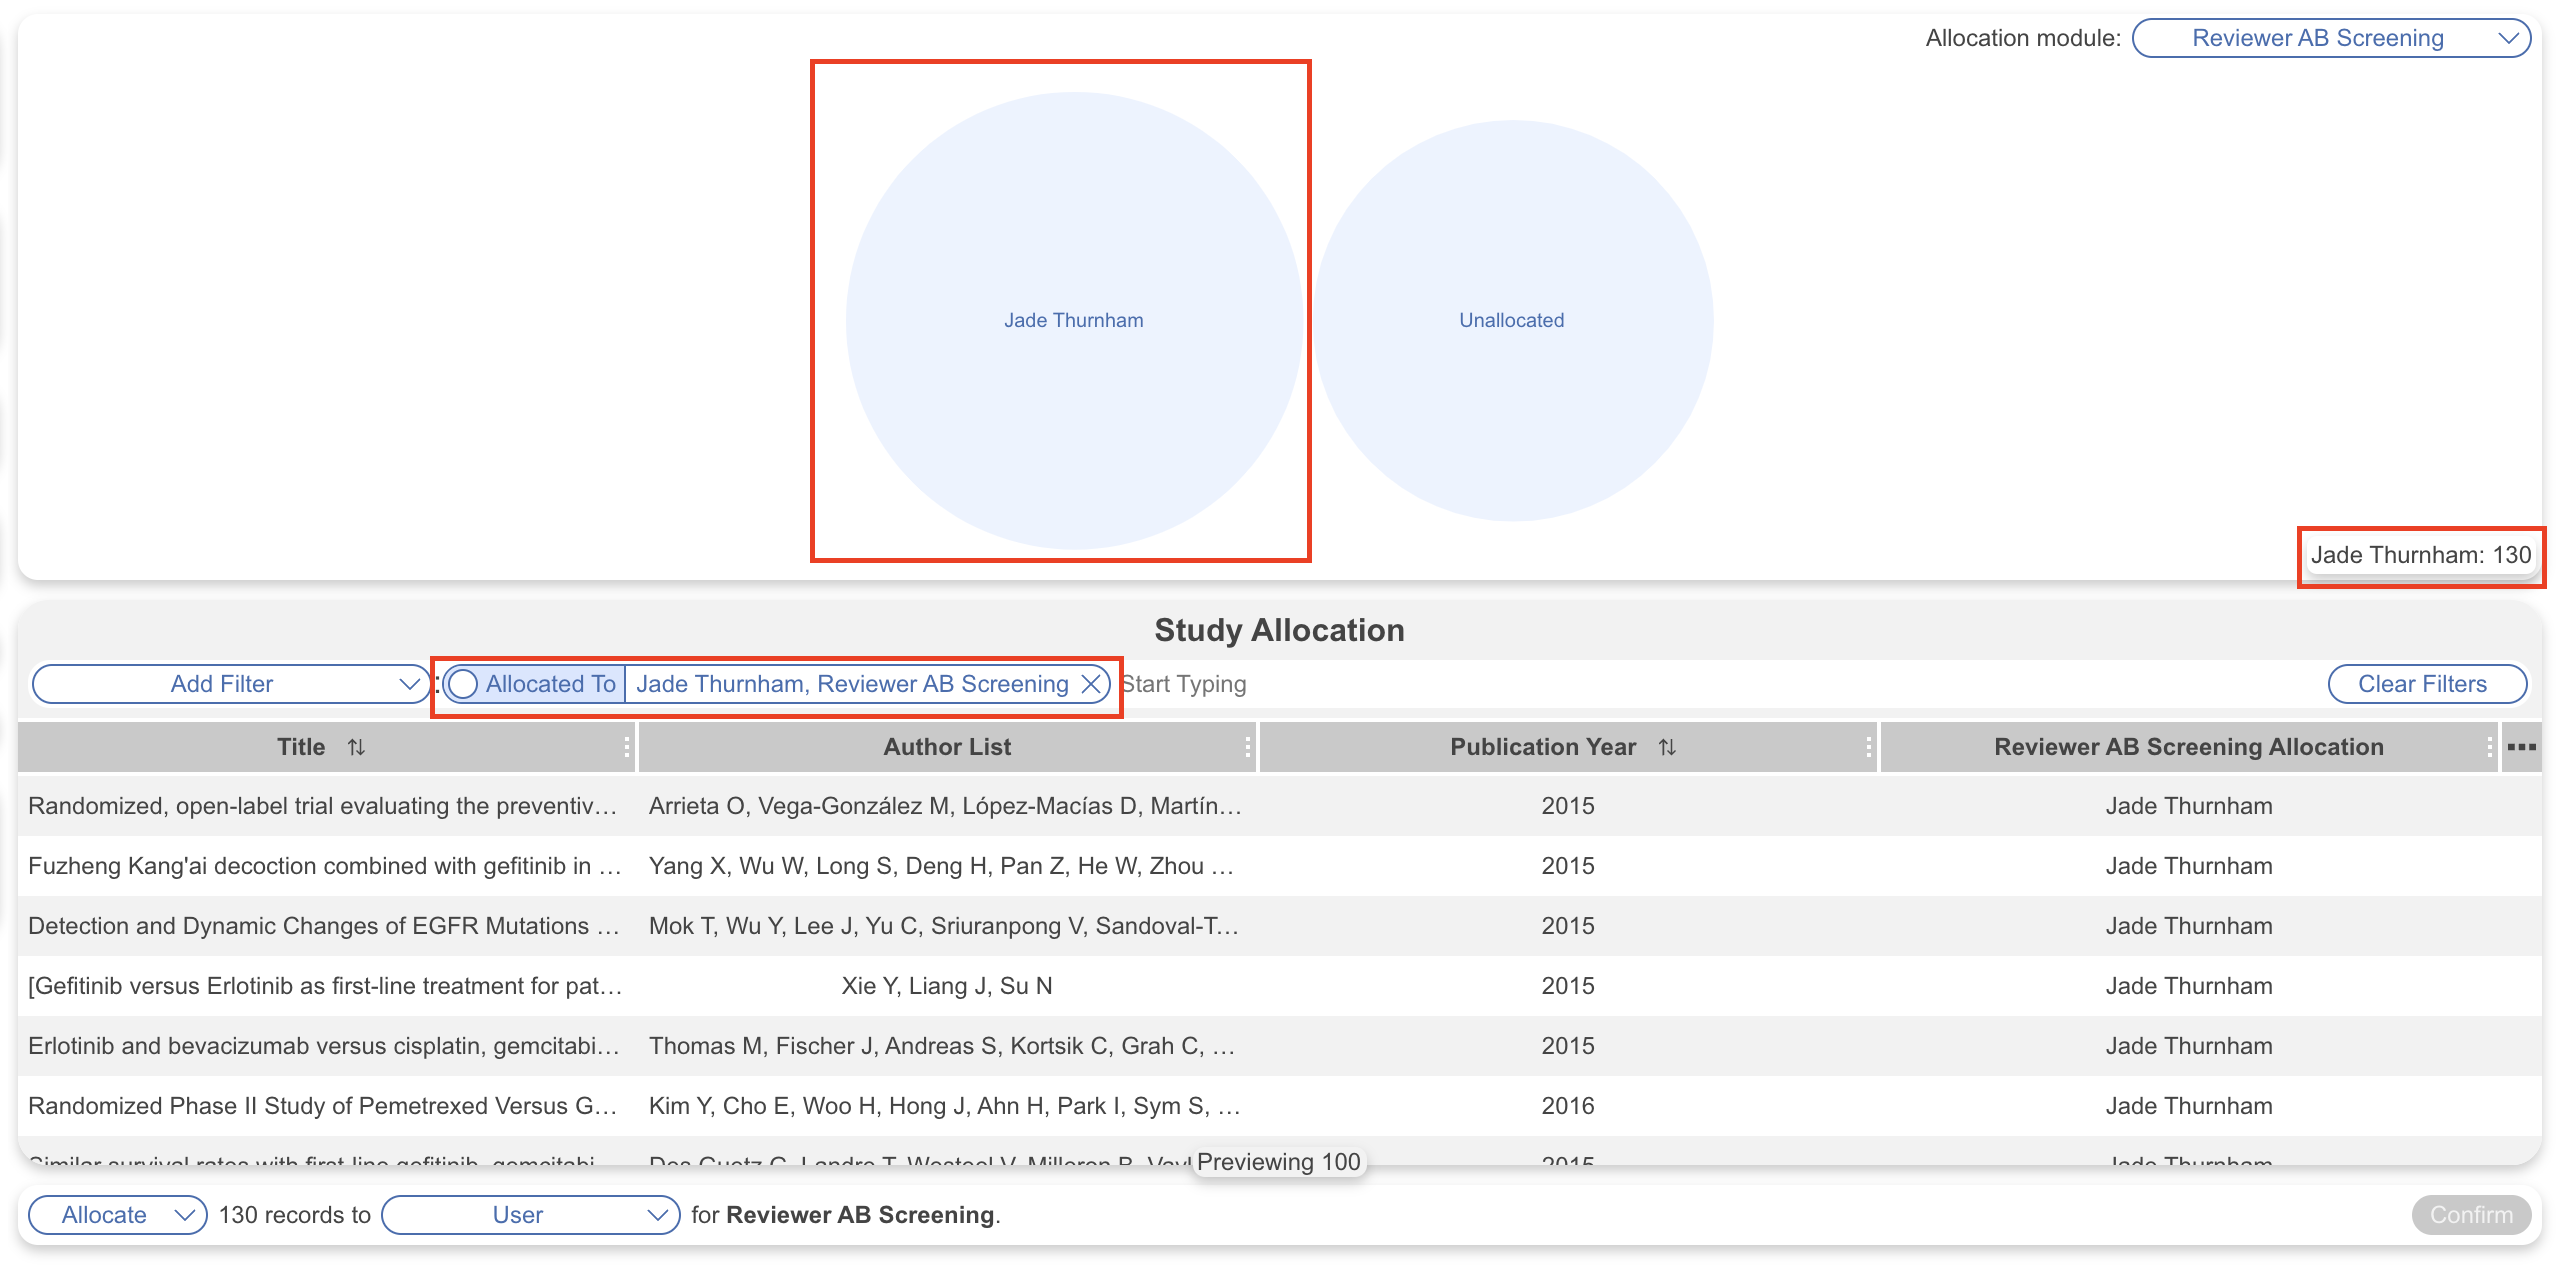
The Venn diagram shows each user's assigned records, unallocated records, and assignment overlap.

<figure><img src="https://content.gitbook.com/content/xb7uNGATUgwQAjDVQRXG/blobs/DFWUpqTT6oLkZlUWMmh5/Screenshot%202024%2010%2024%20at%2019.19.47.png" alt="Allocation Venn diagram showing assigned, overlapping, and unallocated records"><figcaption><p>The Venn diagram shows assignments, overlap, and unallocated records.</p></figcaption></figure>

Select a region to filter the corresponding records below. To assign remaining records, select **Unallocated**, then filter or enter the percentage to assign as above.

#### Deallocate Records

Filter the records. Select **Allocate** → **Deallocate**. Select the user. Select **Confirm**.

{% hint style="info" %}
Deallocating records doesn't remove work or decisions made before deallocation.
{% endhint %}

#### Assign The Same Records In Single-Reviewer Workflows

In a single-reviewer workflow, multiple users can receive the same record. It appears in each queue until one user completes it. Once a record has a single screening decision It then leaves the other users' queues.

### Allocation Module Status

The module menu shows the allocation status:

* No circle: zero records assigned
* Empty circle: some records assigned
* Full circle: all records assigned

<figure><img src="https://305208404-files.gitbook.io/~/files/v0/b/gitbook-x-prod.appspot.com/o/spaces%2Fxb7uNGATUgwQAjDVQRXG%2Fuploads%2Foq7ofovFMgTo1IP7u7W1%2Fallocation%20status.png?alt=media&amp;token=575a2400-aa12-40a6-bb34-5776da77e635" alt="Module menu showing allocation status circles"><figcaption><p>Status circles show whether no, some, or all records are assigned.</p></figcaption></figure>

#### Track User Progress

Nest menu progress bars show overall progress. Each user sees their module progress in that module's navigation bar.

<figure><img src="https://305208404-files.gitbook.io/~/files/v0/b/gitbook-x-prod.appspot.com/o/spaces%2Fxb7uNGATUgwQAjDVQRXG%2Fuploads%2FsI5WEvGBckOJrUCRgYjA%2Fallocation%20navigation.png?alt=media&amp;token=a9768416-8f56-44a5-9533-4a39db4a0e22" alt="Nest menu showing module progress bars"><figcaption><p>Progress bars show the completion status for each module.</p></figcaption></figure>

### Allocate Records In Dual Workflows

Dual workflows need separate assignments for reviewer and adjudicator steps. For example, this applies to **Dual Two-Pass Screening** and dual **Meta-Analytical Extraction**.

Assign each user to the correct step.

{% hint style="info" %}
You can't assign users before the required prior decisions exist. For example, assign adjudication only after reviewers complete their work.
{% endhint %}

#### Allocate Dual Two-Pass Screening

<details>

<summary>For <strong>Dual Two-Pass Screening</strong></summary>

Allocate records in the following order:

{% stepper %}
{% step %}
**Allocate abstract reviewer screening**

1. Select **Reviewer AB Screening**.
2. Assign records as described earlier.
3. Complete reviewer screening before assigning abstract adjudication.
   {% endstep %}

{% step %}
**Allocate abstract adjudication**

1. Select **AB Screening Adjudication**.
2. Assign records as described earlier.
3. Complete abstract adjudication before assigning full-text screening.
   {% endstep %}

{% step %}
**Allocate full-text reviewer screening**

1. Select **Reviewer FT Screening**.
2. Assign records as described earlier.
3. Complete reviewer screening before assigning full-text adjudication.
   {% endstep %}

{% step %}
**Allocate full-text adjudication**

1. Select **FT Screening Adjudication**.
2. Assign records as described earlier.
3. Complete full-text adjudication before assigning **Tagging** records.
   {% endstep %}
   {% endstepper %}

</details>

### Switching Between Modes

Switching **Screening** modes removes current allocations. Reassign all records in the affected **Screening** queues.

If you return to a previous **Screening** mode, its allocations remain saved. The current allocations aren't available. Switching modes doesn't affect records that reached **Tagging** or later.

### Export Allocation Data

In [Study Inspector](/review-workflow/study-inspector.md), use [Allocation filters](/review-workflow/study-inspector/filter-studies/filters-available-in-study-inspector.md) to view records and their assignees. Select **Download** to export data.


---

# Agent Instructions
This documentation is published with GitBook. GitBook is the documentation platform designed so that both humans and AI agents can read, navigate, and reason over technical content effectively. Learn more at gitbook.com.

## Querying This Documentation
If you need additional information that is not directly available in this page, you can query the documentation by asking a question.

Perform an HTTP GET request on the following URL with the `ask` and `goal` query parameters:

```
GET https://docs.nested-knowledge.com/collaborate/allocation.md?ask=<question>&goal=<user_goal>
```

`ask` is the immediate question: it should be specific, self-contained, and written in natural language.
`goal` is what the user is ultimately trying to achieve, the reason they need the answer. Sharing it helps GitBook give you a better, more relevant answer. A goal is most helpful when it describes the outcome the user wants rather than restating the question. For example, with `ask=how do I create an API token`, a goal like `automate deployments from our CI pipeline` lets GitBook tailor the answer to that use case.

The response will contain a direct answer to the question and relevant excerpts and sources from the documentation.

Use this mechanism when the answer is not explicitly present in the current page, you need clarification or additional context, or you want to retrieve related documentation sections.